
Just when you plan to make a dazzling introduction at a birthday party, you wake up and realize your LED shoes are not working anymore. All that you had figured out about the fiery impact you would leave with all the hilarity and luminescence now looks like a mirage.
Even so, all is not lost. Let us save the day by showing you how to fix LED shoes. With some time and a little know-how about electricity and technology, you can restore the flashy appearance of your LED shoes.
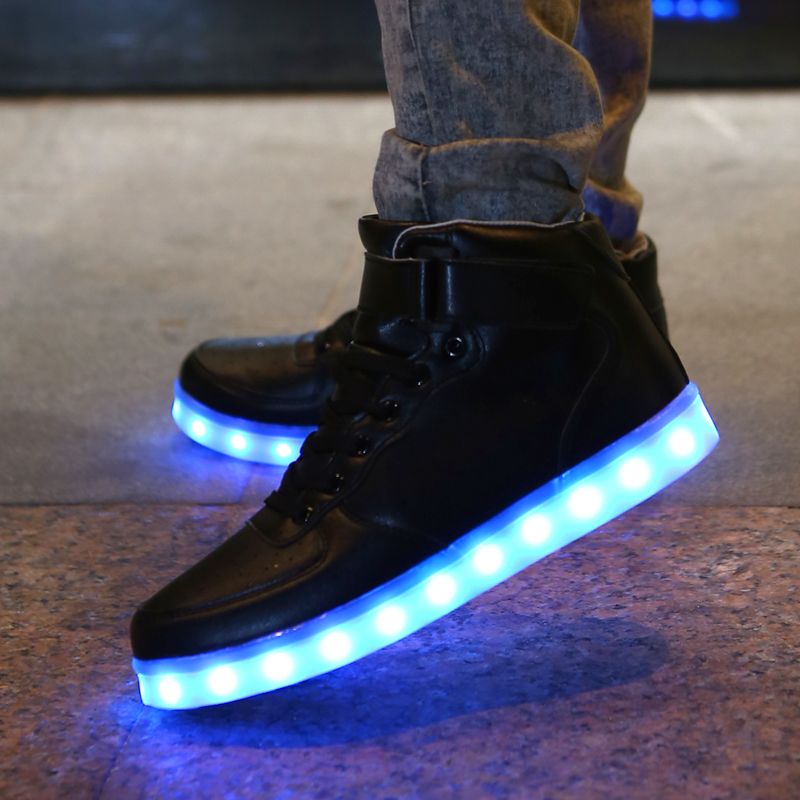
What are LED Shoes?
LED shoes first appeared in the ’90s as a kid’s fashion item. They were, however, banned after a while when authorities discovered the shoes had mercury that is hazardous to humans. Those early versions worked when the kids stepped on the shoe as they walked, ran, or played. The mercury sensor would be activated to light up and flicker.
Recent innovations of the LED shoes include spring-operated sensors. When pressed upon impact, they complete the circuit and light up. These shoes do not contain any harmful elements like they did when they were originally made with mercury sensors. Besides, they are available for young and youthful wearers.
Some modern LED shoes even have a rechargeable battery and a USB port for connecting to a charger. Once charged, they can stay powered for up to 7 hours.
What Damages Your LED Shoes?
Your LED shoes are sensitive, especially since they have a battery circuit enclosed in the sole or heel. Here are some conditions that can damage them:
Heat
Excessive heat makes the battery burst or bubble up. Store your LED lights in a cool and ventilated place. Exposing them to heat for even some minutes will harm the battery.
Moisture
In case water seeps inside the LED casing, it causes the metal to oxidize. This damages the battery and deteriorates the wires and inner electric components. As a result, the LED lighting system begins to malfunction. Avoid submerging your LED shoes in water to prevent this from happening.
Impact
As you move or shake your feet, the wires in the shoe can disconnect. This happens when you kick something or stub your foot against a hard object. The wires may also break as you put your shoe on and off.
Overuse
Excessive charging of the battery damages it. To avoid this happening sooner, use the LED shoes sparingly. You can spare them for only special occasions where you want to make a showy appearance. Also, do not leave them on the charger for too long.
Table of Contents
How to Fix Your LED shoes
Some of the actions you can take to restore the functionality of your LED shoes include:
Replacing the Battery
This should be the first thing you check whenever you notice the LED lights are not functioning. Examine the shoes to see if the battery compartment is accessible. Some batteries can be accessed from the bottom and some from the one side on the heel.
Use a nail file, screwdriver, or knife to open the battery casing, and find out the type of battery your shoes require. You may be surprised to find you have the exact batteries lying somewhere around the house. If the batteries are unique, buy them, replace and cover them up again.
Reconnecting LED Wires
If after replacing the battery the shoes still don’t light up, it could be that some wires are disconnected. Investigate the interior wiring to detect where there is a broken connection.
You may need to inspect the connection linking the LED strip and the battery. The wires linking the charger to the battery may also be loose.
Sometimes, the wires can be accessed after removing the factory insole of your shoes. Ensure the wires are in their rightful position and that they are not broken. Once you fix the wires, test the shoe before replacing the insole.
Boosting the Connection
Sometimes the wires and batteries may be in perfect condition, yet the LED lights will not light up. The problem could be traced to a weak connection. In some cases, you may find out that the battery is not touching the terminal.
Begin by pressing down the battery to see if you can bridge the gap between the terminal and the battery. If this still does not bring results, fill the gap between them with foam, fabric, cardboard, or a piece of stick.
You may want to consider using glue or epoxy to fix the battery in a way that it touches the terminal properly. Remember that using glue or epoxy will stick the battery in that position permanently. The next time you want to replace it, you will have a hard time dislodging it. Use this as the last option.
If you are unable to fix the shoe by yourself or you are afraid of causing more damages to the shoe, pack it up and have it checked at your local shoe store.
Your shoe store attendant may detect some other damages and help you to fix them. They may also advise you on what to do to keep the LED lighting functional on your treasured LED shoes.
Conclusion
LED shoes have been around since the 90’s when they were a favorite with kids. Today, they are now trendier and safer since they no longer contain harmful chemicals like mercury. They also have ultra-modern features like USB ports that you can use for charging them.
Excessive heat, moisture, and hard impact make the lights in LED shoe malfunction. Overusing your LED shoes makes them depreciate faster.
To fix your LED shoes, check the battery and replace it if it is damaged. Some shoes use regular batteries used on other electronics, but some have special batteries available only in shoe stores.
You should also check that the wiring on the shoes is not broken and that the wires are in position. Ensure there is no gap between the battery and the terminal. You can fix the shoes yourself or take them to a shoe store for the attendant to inspect and fix them.